2026-08-01
Make Clothing Photos for Your Webshop Without a Shoot
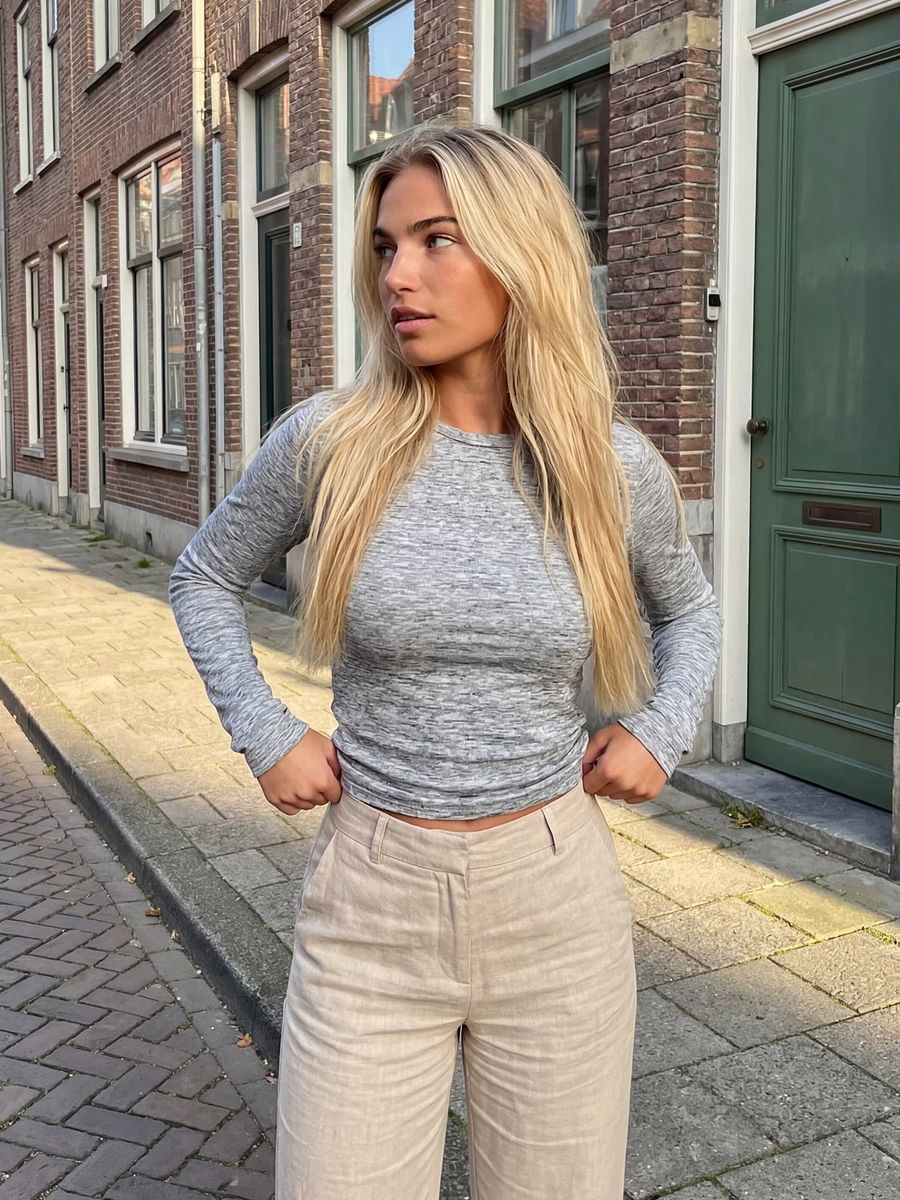
Yes, you can make clothing photos for your webshop without a separate shoot: with image-to-image you place an existing garment on a generated model in a scene of your choice, while keeping the color, print and drape of the real product as your starting point. The trick isn't inventing pretty models, it's transferring your actual garment accurately into a believable on-model photo.
Why clothing photos make or break your webshop
Your product photo is usually the first and most important thing a buyer judges. Large-scale user research by the Baymard Institute found that the first action of 56% of visitors on a product page is to look at the images, before they read the title or description (Baymard). The same research shows that 42% of users try to gauge a product's size and scale from its photos (Baymard).
For clothing this matters even more, because fit is hard to judge on a screen. That shows up in returns: according to the NRF and Happy Returns, 19.3% of all online purchases were sent back in 2025, and apparel sits structurally above that because size and fit are difficult to estimate in advance. A photo that conveys the fit, the drape and the true color helps the buyer choose correctly and prevents disappointment later.
What an on-model photo is and when AI fits
An on-model photo shows a garment worn by a person, rather than laid flat or on a mannequin. Buyers can see how it hangs, how long it is and how the fabric moves. AI is strong here for mood and lifestyle imagery, seasonal variants and fast content, without booking a studio and model for every product.
Use AI with care: when the exact fit matters down to the centimeter, you still need a real fit photo or a clear size chart. In that case, use AI images as a complement that sells the look and the mood, not as the single source of truth about size.
How to make an on-model clothing photo step by step
- Start with a sharp photo of the real garment. A flat lay, a shot on a hanger or a ghost-mannequin photo works well. This image is your source of truth for color, print and cut.
- Use that photo as a reference in image-to-image. Upload it into the photo generator and describe the model, the pose and the scene, instead of letting the model invent everything.
- Keep the prompt concrete. State the pose (standing, three-quarters to camera), the light (soft studio light or daylight by a window), the background (plain studio or street scene) and the aspect ratio. Let the prompt generator write a full description if you get stuck.
- Generate several variants and pick the best. If you work with a fixed photo generator persona, you keep the same model across all your products.
- Finish the image. Clean up the background or replace it with the background remover, and enlarge the result with the upscaler so the detail zoom on your product page stays sharp.
Keep the fit, color and drape accurate
The biggest pitfall is the model "inventing" the garment: a print that shifts, a logo that warps or a color that comes out slightly off. So always steer with the real product photo, not text alone, and then check deliberately.
- Compare with the original. Go over the print, seams, buttons and logos. If a detail is off, fix it precisely with inpainting in the photo editor rather than regenerating the whole photo.
- Watch the drape. Satin shines and folds differently than denim or knitwear; name the material in your prompt so the drape is right.
- Show what you ship. The image must match the product the customer receives. That isn't just fair, it also prevents returns and complaints.
Consistency across your whole catalog
A catalog looks professional when every product is shown the same way: the same type of model, the same lighting, the same background and aspect ratio. Build a fixed set of prompt blocks for that and reuse it per item. If you generate a series of variants or seasonal looks, let the prompt generator write a coherent series in one go. That keeps your feed and your product grid calm, recognizable and trustworthy.
Frequently asked questions
Can you show a garment realistically on an AI model?
Yes. By using a sharp photo of the real garment as a reference in image-to-image, you transfer the color, print and cut onto a generated model. The result works well for mood and lifestyle imagery on your product page.
Does AI fully replace a real product shoot?
For lifestyle and mood imagery it often does, and it saves time and cost. Where the exact fit is decisive, a real fit photo or a clear size chart is still needed as a complement.
How do you keep the color and print accurate?
Steer with the real product photo instead of text alone, then compare the result detail by detail against the original. Fix small deviations in a logo or seam precisely with inpainting, rather than regenerating everything.
Which aspect ratio should you use for clothing photos?
For product pages, portrait (4:3 or 3:4) usually works best because you show the whole look. For a social post, choose 1:1 or 9:16. Set the ratio up front and don't crop afterward, which costs detail.
Want to see how your own product looks on a model? Create an account, top up any amount you like and pay only per render. Put the same outfit in a few scenes and pick the image that sells.